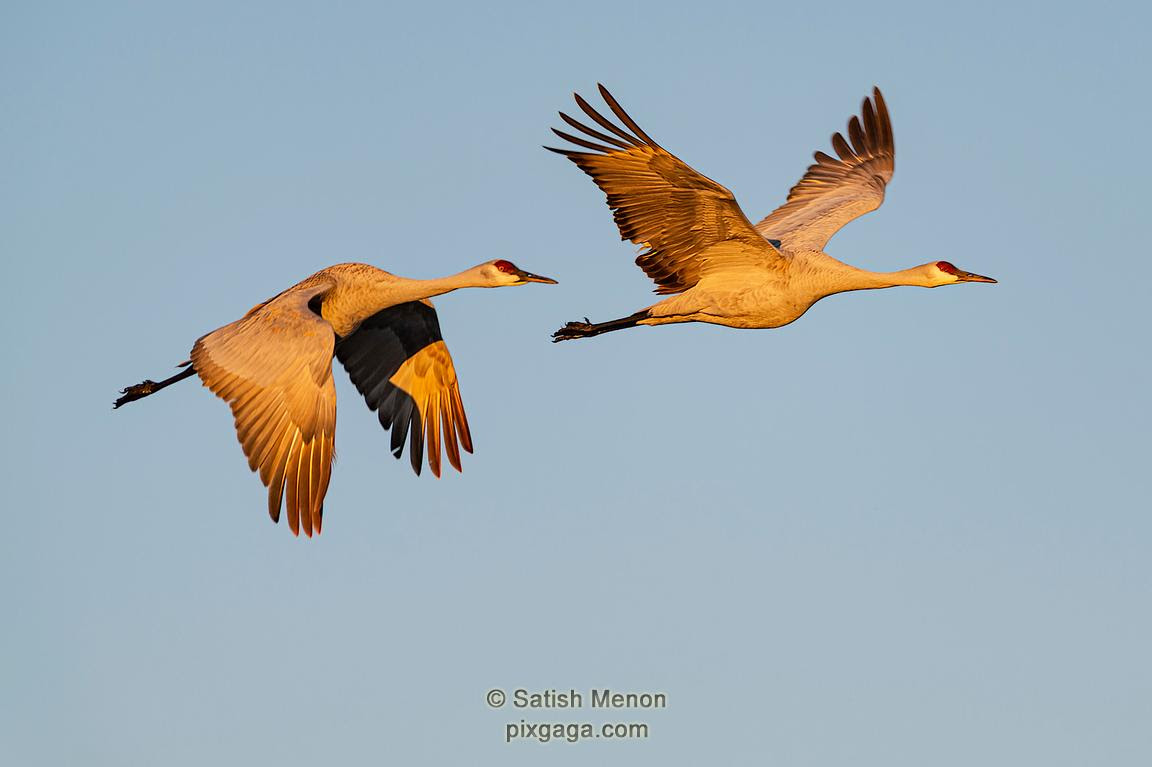
During my 3 photography sessions at Bosque recently, it was fun to find the ponds that had Sandhill Cranes on them. Furthermore, as they took flight, capturing their flight action was a delight. While I captured many frames with one of them, I have a few good keepers with two or three of them in it.
The main technical challenges with such a photograph – (1) Captured two of them in the frame, but the focus did not hit the mark on their eyes (2) One of them is in focus and the other is not (3) The wings of one of them got cut off by the frame (4) The head/eyes of the birds are not front lit (5) There are other birds in the frame, causing a distraction (6) The background such as a tree or hill, causes a clutter (7) etc etc etc.
The main physical challenges of such a photograph – (1) I had to wake up very early at 4:30am local time (2) It was very cold at 28 degrees F – I had gloves on to keep my hands warm, but it was impossible to operate my camera with thick gloves on – I would make photos until my hands almost froze and then thaw in gloves for a while before trying again.
The golden color on the birds in this photograph is a result of the low rising sun.
Sandhill Cranes, Bosque Del Apache National Wildlife Refuge, New Mexico, USA
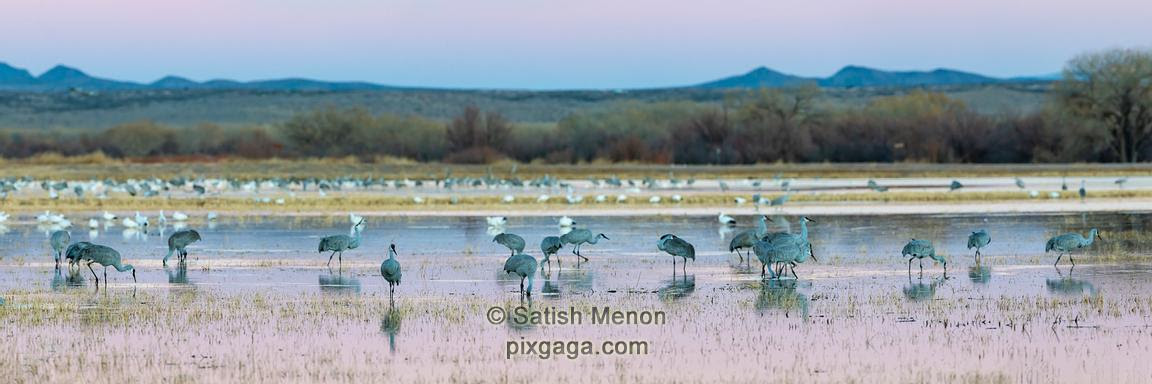
During a recent road trip, I spent a day and a half at the Bosque Del Apache National Wildlife Refuge in New Mexico. By far, it is one of the best places I have photographed birds.
A day and a half usually means one dawn session, one dusk session and another dawn session the following day. No photography is done in the middle of the day, between dawn and dusk.
When I visit a place for the first time ever, I rarely make any good photographs. I am so unfamiliar with the place that most of my mental energy is dissipated in just figuring out the roads or the points to stop at, or simply getting an overview of the place. Consequently, during my very first dawn session, I made some frames, but no keepers.
In my second visit, the dusk session of day 1, I made this photograph. I discovered the location from which I could get close to the sandhill cranes. However, in this session, the whole landscape was more important to me, than the birds themselves,. The post sunset pink in the sky and its reflection in the water, brackets the birds. Furthermore, the bluish cast of the distant hills nicely complements the bluish gray on the birds themselves.
This is my first ever pano photograph made with my 200-500mm lens at the 500mm end. Several vertical frames were shot overlapping each other and this panoramic frame was stitched together in Lightroom. The final file is 85 megapixels, suitable for a large fine art print.
Is this a landscape photograph or wildlife photograph? Email me at info@pixgaga.com on your thoughts.
Sandhill Cranes, Bosque Del Apache National Wildlife Refuge, New Mexico, USA
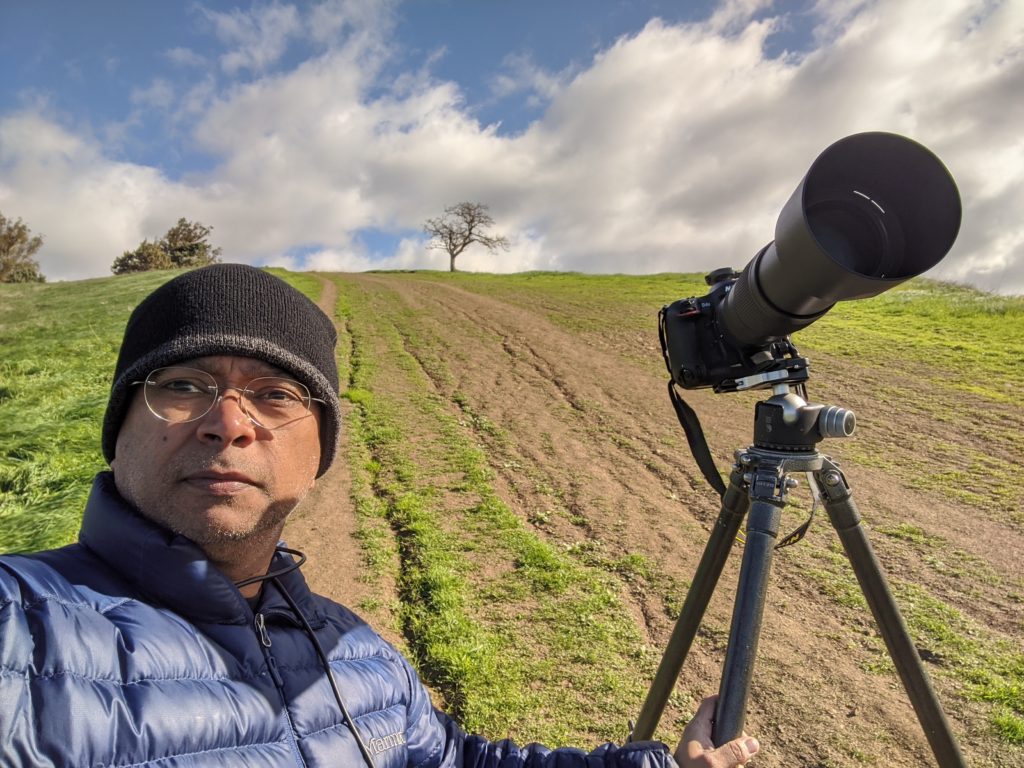
People not familiar with wildlife photography, assume naively that just because I have a super-telephoto lens as shown below, I can zoom in and shoot a mole on a rat’s behind, a mile away.
This is not true.
Caption: This is me, with my Nikon D4S and Nikkor 200-500 f5.6 lens.
So, how much can you zoom?
In other words, how far can a bird be, to be able to shoot it with sufficient quality, so that one can look at the resulting image and be able to see details (eyes, feather details etc)?
I am going to get a bit technical with high school physics.
The ratio of the “image size” to the “object size” is the same as the ratio of the “lens focal length” and the “object distance” from the lens.
Let’s define the terms contained here.
Image Size – The size of the image on the sensor. In 35mm photography, the size of the sensor is 24mm x 36mm. In a horizontal image, if a bird’s image should occupy half the height of the sensor, the image size is 12mm. If the length of the bird along the length of the sensor should occupy half the sensor’s length, that should be 18mm.
Object Size – This is the height or length of the bird in real life. For a sparrow, the length is around 150mm and the wingspan is around 200mm.
Lens Focal Length – When you buy a lens, it is mainly differentiated by its focal length, although the other differentiating characteristic is its maximum aperture. Discussing max aperture is beyond the scope of this post. So, for my Nikkor 200-500mm lens, the focal length is variable between 200mm and 500mm.
Object Distance – This is the distance between the bird and the lens. This is the answer we are seeking – “how far can you zoom?”.
Having established this much, it is now easy to make the necessary calculations. To illustrate, let us take a few examples.
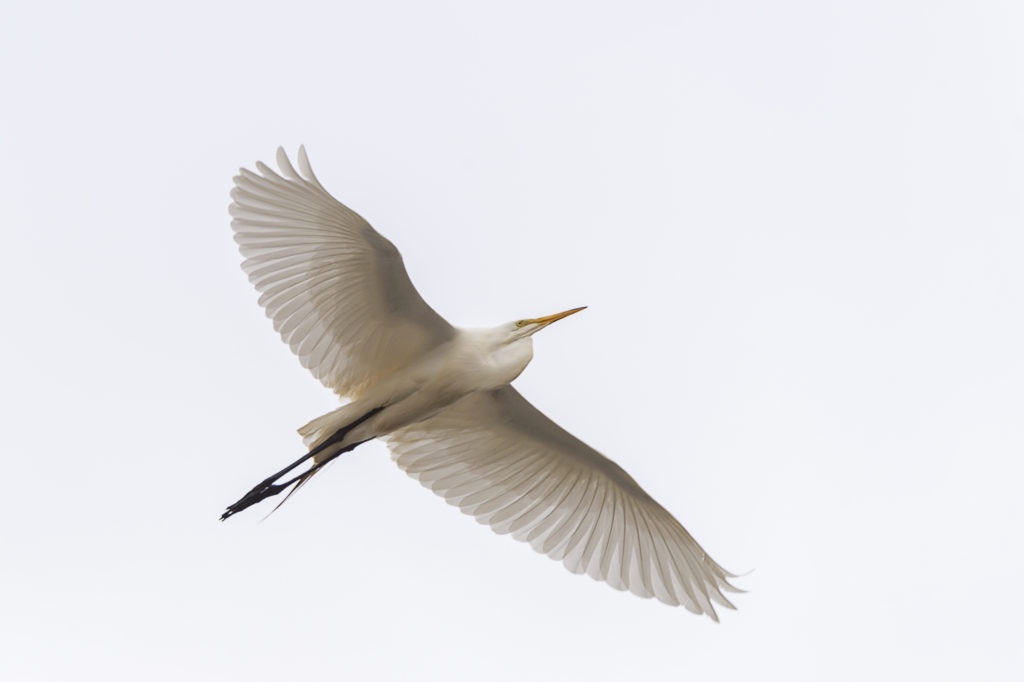
Example 1: With my 400mm lens, how close was I to this snowy egret, when I made this image?
Caption: Snowy Egret in flight, Don Edwards Wildlife Refuge, Alviso, CA
Let us estimate that the wingspan of this bird image is about half the horizontal length of the sensor and therefore “Image Size” = 18mm. Snowy Egret wingspan is roughly 40 inches or 1000mm. Therefore “Object Size” = 1000mm. I used a focal length of 400mm.
Therefore, we can now easily calculate the bird distance as follows:
Distance of bird = Focal length x Object Size / Image Size
Distance of bird = 400mm x 1000mm / 18mm
Distance of bird = 22,222 mm = 22 meters.
Example 2: How far can a sparrow be to fill the frame the same way as example 1?
Let’s use the same 400mm. The sparrow wingspan is 200mm. Therefore:
Distance of sparrow = 400mm x 200mm / 18mm
Distance of sparrow = 4,444 mm = 4.4 meters.
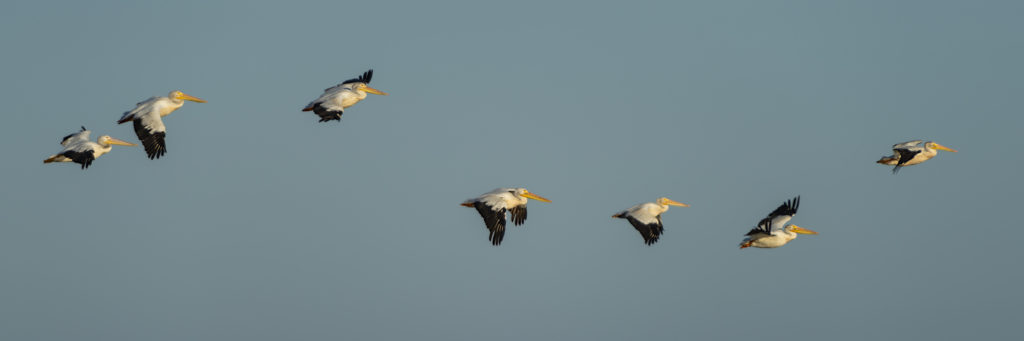
Example 3: In the following image, how close was I when I photographed these american white pelicans?
Caption: American White Pelicans in flight, Don Edwards San Francisco Bay Wildlife Refuge, Alviso, CA, USA
Estimate the bird image size to be 10% of the sensor length or 3.6mm. Assume the same 400mm lens. These pelicans are roughly 60 inches or 1500mm in length. The calculation is straightforward:
Distance of these birds = 400mm x 1500mm / 3.6mm
Distance of these birds = 166,667mm = 167 meters.
Example 4: What if you used a 600mm lens, instead of 400mm?
You can now have 50% additional distance between you and the flying bird.
Example 5: What if you used a 200mm lens, instead of 400mm?
Your distance to the bird needs to be halved.
Example 6: What lens would you need, to fill half the frame sensor with a sparrow that is 100 meters or 100,000mm away?
The calculation would be:
Focal length needed = 100,000mm x 18mm/200mm = 9000mm.
The longest lens that is commercially available today is the 800mm lens. That lens costs about $ 12,000 or more. There is no 9000mm lens. Your best bet is to master techniques to get closer to the sparrow.
Example 7: What if I used a 1.5x crop sensor (an APS-C sensor), which is roughly 16mm x 24mm?
You will get additional 50% distance from the bird.