Category Archives: Landscapes

Alaska#8

Glacier, Snow laden Chugach Mountains and Clouds, seen from Prince William Sound, Alaska.  The glacier inlet you see on the left is the same one that was on the right in Alaska#6.  As the boat moved away from the spot of Alaska#6, I fired several frames.  The visual overload that day was a little too much and I ended up with tired hands and shoulders, carrying two camera bodies and two heavy lenses in extremely cold and wet weather.  All worth it.  Nikon D700 with Nikkor 70-200mm f2.8 lens.

Prince William Sound, Alaska, USA

Buy a print – Link

Register for my next webinar or ask a question for potential inclusion in my upcoming ebook, “101 tips for Digital Travel Photography” – Link

Alaska#7

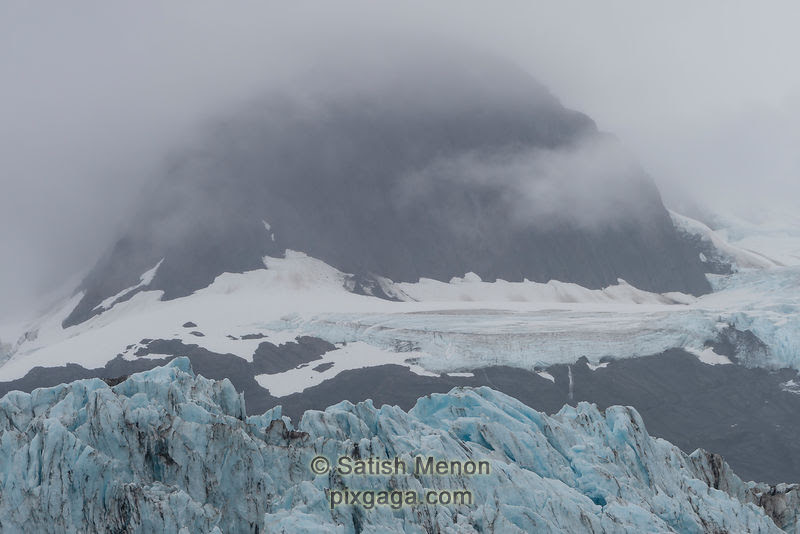
Iceberg, snow, glacier, hill and clouds, Chugach Mountain range, seen from Prince William Sound, Alaska.  There are so many elements here.  The foreground iceberg in blue, the extension of  a glacier on the right, snow on the left and the hill covered in clouds.  I was shooting with my D4S loaded with the Nikkor 200-500mm f5.6 lens and this scene needed me to go wider.  Instead of changing my lens, I simply shot several frames that covered the top left, the top right, the bottom left and the bottom right.  I stitched them all together to create this image.  Images of this form factor are usually not stitched, but given the lens I had with me at the time, I had to improvise.  I am glad I did.  Looking at this image, I still feel the same chills that I felt that day. 

Glacier and hill, Prince William Sound, Alaska, USA

Buy a print – Link

Register for my next webinar or ask a question for potential inclusion in my upcoming ebook, “101 tips for Digital Travel Photography” – Link

Alaska#6

Glaciers on Chugach Mountains, as seen from Prince William Sound, Alaska.  Pano shot stitched from several individual frames.  On the left you see the same glacier photographed in Alaska#1, but the boat was a lot closer when this was photographed.  To the right, you see another glacier inlet into the bay.  Nikon D700 with Nikkor 70-200mm f2.8 lens.

Prince William Sound, Alaska, USA

Buy a print – Link

Register for my next webinar or ask a question for potential inclusion in my upcoming ebook, “101 tips for Digital Travel Photography” – Link

Alaska#5

Iceberg, Prince William Sound, Alaska.  This was the first time ever that I witnessed an iceberg.  Needless to say, my Nikon D4S with the Nikkor 200-500mm f5.6 lens was smoking from all the work it got.  For a native Alaskan, this may not be a novel sight.  For me, it was.

Iceberg, Prince William Sound, Alaska, USA

Buy a print – Link

Register for my next webinar or ask a question for potential inclusion in my upcoming ebook, “101 tips for Digital Travel Photography” – Link

Alaska#4

Glaciated Chugach Mountains and clouds, as seen from Prince William Sound, Alaska.  Several individual frames stitched together in Lightroom to create this pano shot.  Nikon D700 with Nikkor 70-200mm f2.8 lens.

Prince William Sound, Alaska, USA

Buy a print – Link

Register for my next webinar or ask a question for potential inclusion in my upcoming ebook, “101 tips for Digital Travel Photography” – Link

Alaska#3

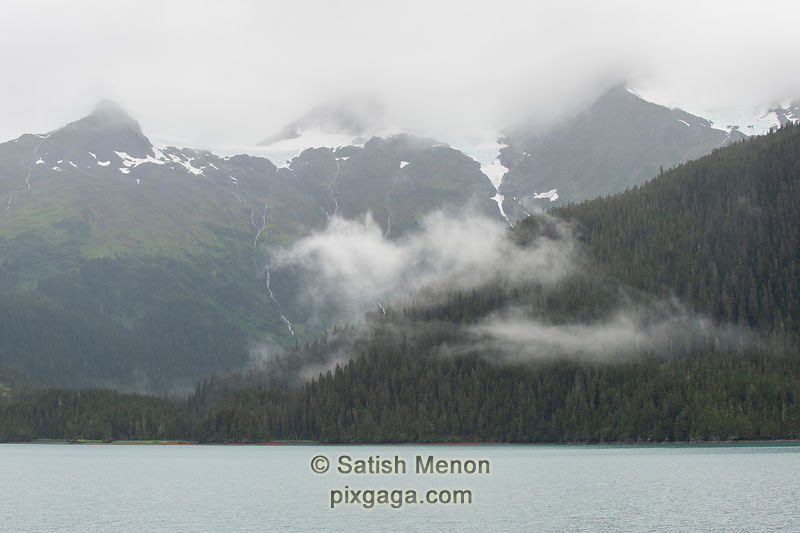
In this shot of the Chugach Mountains shot from Prince William Sound of Alaska, you see a Glacier at the very top with some flow into this bay.  I love how the mountain edges, the glacier, the tiny flows into the bay and clouds all provide a sense of balance in the elements.  This photograph does not do justice to the scale of things I saw that day, but I am trying.  Nikon D700 with Nikkor 70-200mm f2.8 lens.

Prince William Sound, Alaska, USA

Buy a print – Link

Register for my next webinar or ask a question for potential inclusion in my upcoming ebook, “101 tips for Digital Travel Photography” – Link

Alaska#2

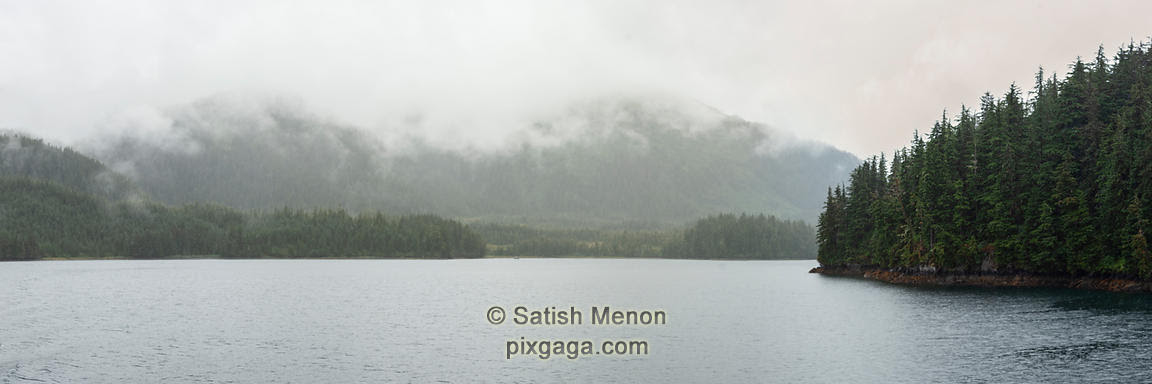
This is another shot of Prince William Sound in Alaska.  I like how the clouds settled over the Chugach Mountains.  The conditions were the same as yesterday’s photograph.  This pano shot was also made by stitching several individual frames using Lightroom.  Nikon D700 with Nikkor 70-200mm f2.8 lens.

Image of Prince William Sound, Alaska, USA
Prince William Sound, Alaska, USA

Buy a print – Link

Register for my next webinar or ask a question for potential inclusion in my upcoming ebook, “101 tips for Digital Travel Photography” – Link

Alaska#1

Late July / early August last year, my family and I visited Alaska.  Needless to say, I carried my photography gear and made some good nature photographs, both landscapes and wildlife.  I have edited around 12000 shots to end up with 65 keepers.  I present them to you now, one a day for the next 65 days.  Hope you like them.

Alaska#1 – Glacier, hills and clouds, Prince William Sound, Alaska, USA, photographed late July.  We stayed overnight in Anchorage and drove our rental car to Whittier, Alaska.  From there, we took a day cruise to see glaciers and icebergs.  Loved the views.  In this photograph, you see a glacier ending up into the Prince William Sound bay.  The mountains you see are the glaciated Chugach Mountains.  It was a foggy day and we weathered cold rain and wind.  It was all worth it.  It was hard keeping the front element of the lens from getting wet.  For this photograph, I used my Nikon D700 with the Nikkor 70-200mm f2.8 lens loaded.  This pano shot was made by stitching several individual frames using Lightroom.  During this shoot, I also had my Nikon D4S loaded with my Nikkor 200-500 f5.6 for other moments.  

Prince William Sound, Alaska, USA

View this in the gallery and order a print – Link.

Register for my next webinar or ask a question for potential inclusion in my upcoming ebook, “101 tips for Digital Travel Photography” – Link.

Discovering my vision at Rainbow Falls, CA

I went to Rainbow Falls in California’s Eastern Sierra over the July 4th weekend.  My first visit to the falls was in the middle of the day, with my family.  Since the sun was shining into the falls at that time of the day, it formed a rainbow at the base of the falls upon which it is named.  From a photographer’s perspective, the light was too harsh and no good waterfall image could be produced at that time.

I came back the next day, early enough before sunrise, to get the light right for a waterfall image.  While the grand view from the standard vista point was great, it did not offer anything satisfying for me.  For example, one search for Rainbow Falls, CA in images.google.com, yields several images of the standard view.  I began by making a standard view image as well.  Here it is.  It does not impress me and therefore it has not been published in my web gallery.

Rainbow Falls, CA

Rainbow Falls, CA. (Standard View from Vista Point)

After getting the standard shot out of the way, I started exercising my visual imagination to make additional more satisfying images.  Using my 70-200mm f2.8 lens at 200mm, I made a frame that was later cropped to this 1:3 format.  This is a section of the waterfall towards the right side of the view from the vista point.  To me, this image is a compelling composition.  It has a series of waters falling from the top right into the bottom one-thirds of the image, where there is a diagonal flow of water from the left to the right.  There are distinct shapes and flows in the top, middle and bottom one-thirds of the image that grabs attention.

Rainbow Falls (section), CA, USA

Rainbow Falls (section), CA, USA

Another shot using my 70-200mm f2.8 lens with 2x teleconverter (set at effective 400mm), is shown below.

Rainbow Falls (section), CA, USA

Rainbow Falls (section), CA, USA

This one shows a single strand of waterfall to the right of the image counter-balancing the diagonal cascade going left to right.

Another 400mm shot is shown below.

Rainbow Falls (section), CA, USA

This one emphasizes the wall of water towards the right of the view from the vista point.  The wall of water and its shapes/texture is counter balanced by the rocks at the bottom right.

As I wrapped up my shoot, I used the same 400mm setup to frame a couple of shots of the runoff from the falls.

Runoff from Rainbow Falls, CA.

Runoff from Rainbow Falls, CA.

This one showcases the whites from the falls runoff counterbalanced by the green grass on the shore.  I saw this first and upon closer examination, I found a dead fallen tree bark whose branches pointed towards these whites.  I thought that they formed a perfect set of complementary subjects to juxtapose in an image.  Here it is.

Dead tree bark and whites from Rainbow Falls runoff, CA, USA

Dead tree bark and whites from Rainbow Falls runoff, CA, USA

Notice how the shapes in the branches of the dead tree bark, mirrors the shapes of the whites (the branches pointing one way and the whites following it).

Using this post, I want to encourage more photographers to look beyond the obvious.  The first thing that you see when you get to location should be photographed, but one should not stop there.  The better photographs come from staying there, a bit longer, and looking for what else is there, or, how else the scene may be photographed.  Changing viewpoints and changing lenses are the simple exercises to get you started on the road to eventually change what you see and see more.

Correcting White Balance in Digital Images using expodisc 2.0

Of all the autoexposure features available in modern DSLRs, the one that is most frustrating for me is the Auto-WB.  For years, I set the white balance to Auto-WB, hoping to be fine with the color in my digital images.  Again, for all those years, my mind wasn’t tuned to deciphering the color issues.  Recently, I noticed that some of my landscape shots looked too blue to me.  Talking to a former photography student and now a good photographer himself, Sanjiv Kapoor, I learned how to adjust the color temperature and the tint sliders in Lightroom to get the right colors.  Furthermore, I learned the idea of using a WB filter to reduce the guesswork involved in this exercise.  Here’s how.

This is my process for RAW shooting.  I attach an expodisc 2.0 WB filter to the front of the lens, in the light condition of the main shot, to make a reference image at metered exposure.  It produces a perfect (18%) neutral gray image.

Neutral Gray Image

Neutral Gray Image made with a WB filter in the same light as the image subject.  Caveat – if you are viewing this post in a monitor not correctly color calibrated, you are not seeing neutral gray.

Once opened in Lightroom, the default may not open up as neutral gray.  It will open up with a default color temperature and tint, that may not be the real color temperature/tint.  Drop the eyedropper from the Lightroom Develop Module into this image.  That neutralizes any color cast in this reference and gives you the right white balance.  Just apply the same color temperature and tint to the desired image.  It is quite easy to do this in Lightroom, by simply “sync”ing the develop settings.  In fact, I spend my time long enough on this reference (see the dust spot in it – I correct that, plus apply the lens profile etc), before “syncing” it to all the frames shot in the same light.

Here’s an example.  As opened in Lightroom, the top image shown here is how it looked.

Image as seen after Lightroom opened RAW file

How this image looked when RAW file was opened up as default in Lightroom. Too blue and not representing what was seen.

This is too blue and did not represent what was seen.  The color temperature was 5750 with a tint of -4.  The neutral gray reference shot shown earlier had a color temperature of 8800 with a tint of -5.  Upon correcting this image to that, the resulting final image is shown below.

Image with corrected white balance

Image with corrected white balance, with the aid of the expodisc 2.0

This represents what was seen.

Now that I have figured this out, and now that I have tuned my mind to seeing colors a bit better, I find all kinds of color errors all over my portfolio from years of work!!  🙂  As I find time, I will keep correcting the color of my past photographs, but I don’t have the reference shots to help me.

NOTE: The user’s manual for expodisc 2.0 talks about a different way to use it.  Take a reference shot into the camera, by using a setting for white balance reference shot.  Then the following images will be rendered correctly.  In my honest opinion, this method is appropriate for jpg shooters.  The method I outlined here is more suited for RAW shooters.